The way he applied cement over those bricks.
Mastering the Art of Cement Application on Bricks: A Step-by-Step Guide
Applying cement over bricks might seem straightforward, but the technique significantly impacts the strength, durability, and aesthetics of a structure. Whether you’re building a wall, repairing masonry, or creating a driveway, mastering the process ensures long-lasting results. In this guide, we’ll break down the professional method for applying cement over bricks, including tools, tips, and common mistakes to avoid.
Why Proper Cement Application Matters
Cement (or mortar) acts as the glue holding bricks together. When applied incorrectly, it can lead to:
- Weak bonds, causing cracks or collapses.
- Water infiltration, leading to erosion and mold.
- Uneven surfaces, compromising visual appeal.
A meticulous approach guarantees structural integrity and weather resistance.
Tools & Materials You’ll Need
Before starting, gather these essentials:
- Bricks: Clean, dry, and debris-free.
- Cement Mix: Portland cement, sand, and water (standard ratio: 1 part cement to 3 parts sand).
- Mixing Tools: Wheelbarrow, hoe, or electric mixer.
- Application Tools: Trowel, pointing tool, jointer, and a bucket of water.
- Safety Gear: Gloves, goggles, and a dust mask.
Step-by-Step Process
1. Prepare the Surface
- Clean the Bricks: Brush off dirt, dust, or loose mortar using a stiff-bristle brush. Wet the bricks lightly to prevent them from absorbing too much moisture from the cement.
- Dampen the Work Area: Spray the bricks and surrounding area with water. This prevents premature drying of the cement.
2. Mix the Cement
- Follow the Ratio: Combine 1 part cement with 3 parts sand in a wheelbarrow. Gradually add water while mixing until the mortar reaches a thick, toothpaste-like consistency.
- Avoid Overwatering: Too much water weakens the mix; too little makes it unworkable.
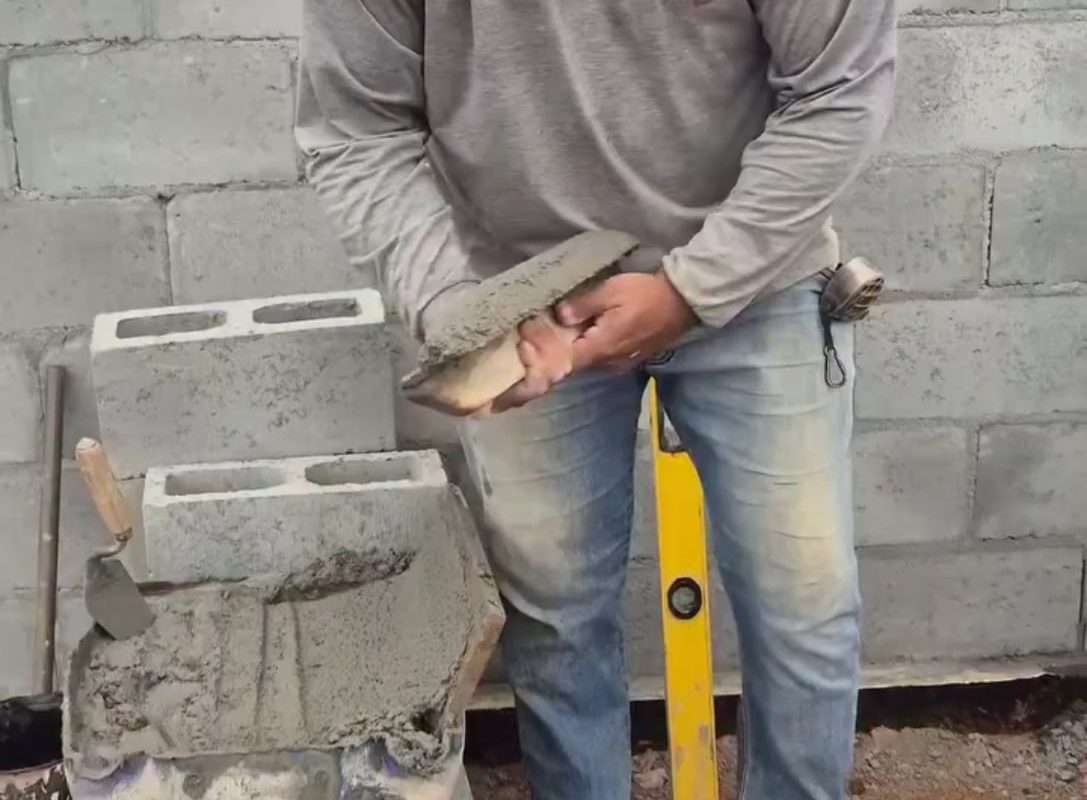
3. Apply the Cement
- Load the Trowel: Scoop mortar onto a brick trowel. Hold the trowel at a 45-degree angle for control.
- “Butter” the Brick: Spread a ½-inch layer of mortar evenly across the top and sides (“edges”) of the brick. This creates a strong adhesive base.
- Work in Sections: Apply mortar to 4–5 bricks at a time to prevent drying before placement.
4. Place the Bricks
- Press Firmly: Set each brick into place, twisting slightly to “bed” it into the mortar. Ensure joints align evenly (use spacers for consistency).
- Check Level & Alignment: Use a spirit level to confirm the bricks are flat and straight. Adjust before the mortar sets.
5. Finish the Joints
- Tool the Mortar: After placing a row of bricks, use a jointer or pointing tool to smooth the joints between them. This compresses the mortar, improving water resistance.
- Remove Excess: Scrape off stray mortar with the edge of the trowel before it hardens.
6. Cure the Cement
- Mist with Water: Lightly spray the structure 2–3 times daily for 3–7 days. This prevents cracking as the cement cures.
- Avoid Loads: Keep the area undisturbed for at least 48 hours.
Pro Tips for Flawless Results
- Work in Shade: Direct sunlight dries mortar too quickly.
- Use Cold Water in Hot Weather: Slows curing time for better workability.
- Monitor Consistency: Re-mix mortar if it stiffens—never add water to old mix.
Common Mistakes to Avoid
- Skipping Dampening: Dry bricks suck moisture from mortar, weakening bonds.
- Uneven Application: Gaps lead to air pockets and cracks.
- Rushing Curing: Premature pressure causes sagging or misalignment.
Conclusion
Applying cement over bricks is a foundational skill for any masonry project. By following these steps—preparing surfaces, mixing mortar correctly, and meticulously placing bricks—you’ll create sturdy, weatherproof structures that stand the test of time. Whether you’re a DIY enthusiast or a professional, precision and patience are key to mastering this craft.
Need more guidance? Explore our tutorials on mortar mixing ratios, bricklaying patterns, or repairing crumbling joints!