Shaving the frost off a small ice block
Title: The Art of Shaving Frost Off a Small Ice Block: Tips for Perfectly Clear Ice
Meta Description: Learn how to shave frost off a small ice block like a pro! Discover tools, techniques, and creative uses for pristine ice shavings in drinks, cuisine, and more.
Why Shave Frost Off an Ice Block?
Frost—the thin, cloudy layer of ice crystals that forms on frozen surfaces—can detract from the clarity and aesthetics of an ice block. Whether you’re crafting cocktails, plating gourmet dishes, or creating decorative ice displays, removing frost ensures your ice looks pristine and melts slower, preventing dilution in drinks. This guide breaks down the best methods to achieve flawless results.
Tools You’ll Need
Before starting, gather these essentials:
- Ice Pick or Awl: For controlled chipping.
- Sharp Knife or Ice Scraper: Ideal for precision work.
- Microplane Grater or Zester: Creates fine, snow-like shavings.
- Kitchen Towels or Gloves: Protect hands from cold and improve grip.
- Boiling Water (Optional): To melt surface frost quickly (use sparingly).
Step-by-Step Guide to Shaving Frost
1. Prep the Ice Block
- Remove the ice block from the freezer and let it sit for 1–2 minutes. Frost softens slightly at room temperature, making it easier to remove.
- Wrap the ice in a thin towel to avoid melting the main block while working.
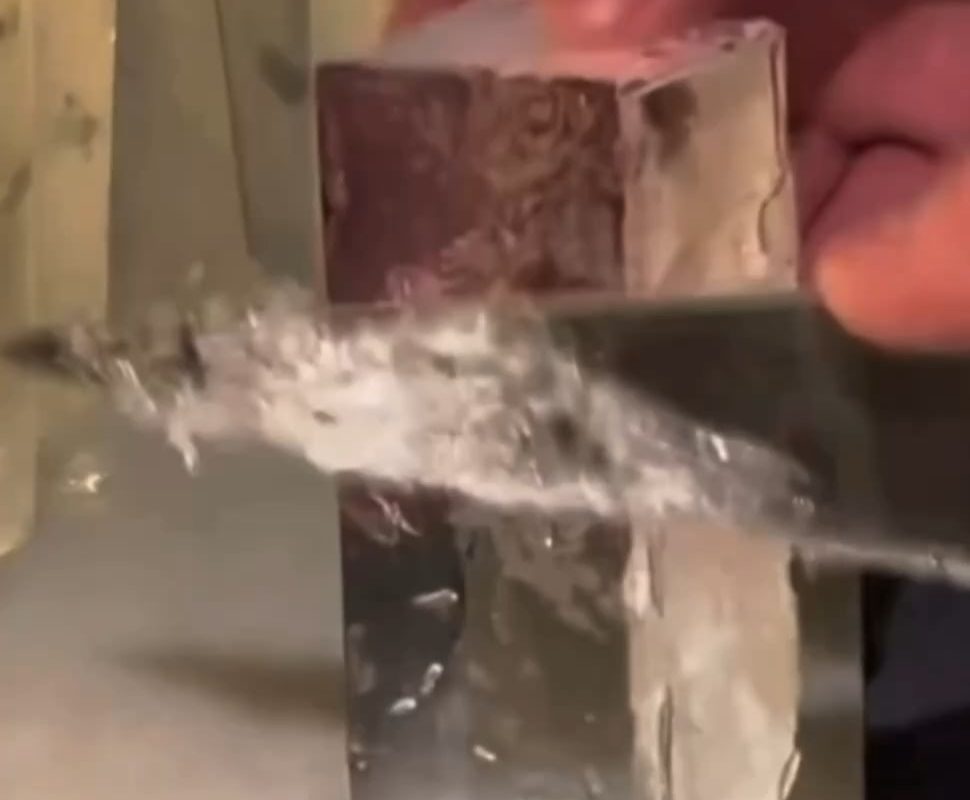
2. Scrape Away Frost
- For light frost, use the flat edge of a knife or scraper. Glide it gently across the surface at a 45-degree angle to lift frost without gouging the ice.
- For thicker frost, an ice pick or awl works better. Chip away vertically, starting at the edges, then smooth the surface with a scraper.
3. Finishing Touches
- Polishing: Dip a clean cloth in hot water, wring it out, and lightly rub the ice to dissolve residual frost. Buff immediately with a dry towel.
- Shaving for Texture: Use a Microplane grater to create delicate ice “floss” for cocktails (like Japanese kakigōri) or dessert garnishes.
Pro Tips for Frost-Free Ice
- Prevent Frost Buildup: Store ice blocks in airtight containers or wrap them in plastic wrap before freezing.
- Work Quickly: Handle ice in short bursts to minimize melting. Return unused blocks to the freezer promptly.
- Use Purified Water: Boiled or filtered water reduces bubbles and impurities, yielding clearer ice that resists frost.
Creative Uses for Shaved Frost & Ice
- Cocktail Artistry: Layer crystal-clear shavings in highball drinks or use as a bed for oysters.
- Dessert Displays: Top sorbets, fruit salads, or pavlovas with ethereal ice “snow”.
- Cold Therapy: Fill injury packs or cooling towels with sterile shaved ice.
Troubleshooting Common Issues
- Melting Too Fast? Work in a cooler room and pre-chill tools.
- Cloudy Residue? Your water may contain minerals. Switch to distilled water.
- Uneven Shaving? Stabilize the ice block on a non-slip mat or damp cloth.
Final Thoughts
Shaving frost off a small ice block transforms ordinary ice into a versatile, visually striking element. Whether you’re a home bartender, chef, or DIY enthusiast, mastering this technique elevates your presentations and ensures every detail shines. With the right tools and patience, you’ll turn frosty ice into a canvas for creativity!
Keywords: How to shave ice block, remove frost from ice, clear ice shaving techniques, frosted ice removal tools, cocktail ice presentation, frost-free ice blocks
Boost Your Content’s Reach: Pair this guide with video tutorials on social media for maximum SEO impact! 🧊✨