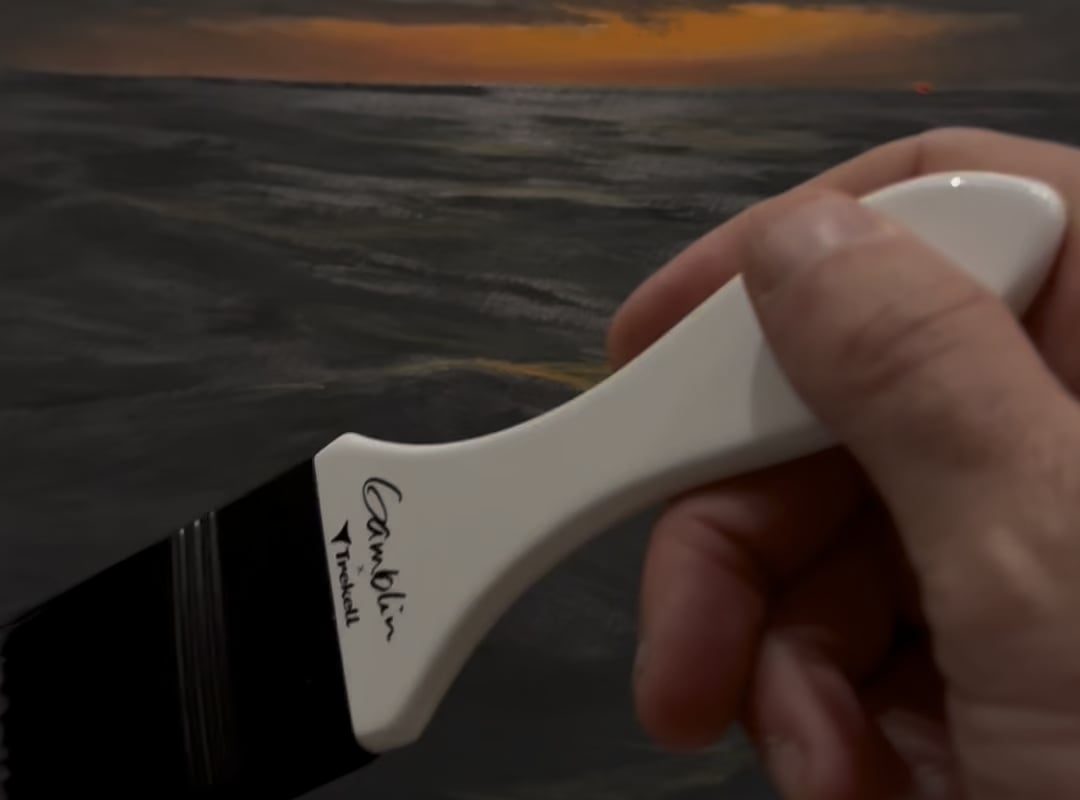
OC. Varnish night for this porthole painting! This one will be headed off to its new forever home this weekend. This may be my favorite sky I’ve painted, and this was a super satisfying varnish on this one.
The Art of Perfection: How Satisfying Oil Painting Varnish Transforms Your Masterpiece
There’s a magical, almost meditative moment in the oil painting process: the application of varnish. For artists, it’s the final flourish—a step that not only protects their work but elevates it to a polished, luminous finish. The right oil painting varnish doesn’t just safeguard your art—it deepens colors, enhances texture, and delivers a profoundly satisfying visual and tactile experience. In this guide, we’ll explore why varnishing is essential, how to choose the best product, and the secrets to achieving that flawless, gallery-ready finish.
Why Varnishing Feels So Satisfying (It’s Not Just About Protection!)
Applying varnish is like watching your painting come to life. The matte, semi-gloss, or glossy finish you choose unifies the surface, intensifies pigments, and adds a layer of depth that makes every brushstroke pop. Beyond practicality, here’s why varnishing feels deeply rewarding:
- Color Revival: Oil paints naturally dull as they dry. Varnish restores richness, giving colors a “wet look” that mimics their original vibrancy.
- Texture Enhancement: Varnish subtly amplifies impasto strokes or smooth gradients, adding dimension.
- Professional Polish: That sleek, reflective finish signals completion—a tactile reward for hours of creative labor.
- Peace of Mind: Knowing your artwork is shielded from dirt, UV rays, and yellowing? Priceless.
Types of Oil Painting Varnish: Finding Your Perfect Finish
Not all varnishes are created equal. Your choice depends on your aesthetic goals and the painting’s environment:
1. Gloss Varnish
- Best for: Maximizing color saturation and creating a mirror-like shine.
- Satisfaction Factor: Offers dramatic depth and vibrance—ideal for works displayed in low-light settings.
- Brands to Try: Gamblin Gamvar, Winsor & Newton Gloss.
2. Matte Varnish
- Best for: Reducing glare and creating a soft, velvety finish.
- Satisfaction Factor: Delivers a timeless, understated elegance—perfect for detailed or textured pieces.
- Brands to Try: Golden Archival MSA Varnish (Matte), Liquitex Professional Matte Varnish.
3. Satin Varnish
- Best for: Balancing gloss and matte effects.
- Satisfaction Factor: The “Goldilocks” option—subtle sheen without overpowering reflections.
4. Removable vs. Permanent Varnish
- Removable (Mastic, Damar): Can be safely dissolved for future conservation.
- Permanent (Acrylic, Synthetic): Offers superior durability but isn’t reversible.
The Art of Application: Step-by-Step to a Perfect Finish
The key to satisfaction? Patience and precision. Rushing this step risks cracks, cloudiness, or unevenness.
When to Varnish
- Wait 6–12 months for oil paintings to fully cure (or use retouch varnish for interim protection).
- Test dryness by pressing your nail into a discreet area—no indentation means it’s ready!
How to Apply
- Clean the Surface: Dust or debris will mar your finish. Use a soft brush or microfiber cloth.
- Workspace Prep: Work in a warm, dust-free area. Lay the painting flat.
- Choose Your Tool: Use a wide, soft varnish brush or spray applicator for even coverage.
- Apply Thin Coats: Start with a 45-degree angle, brushing in one direction. Avoid overworking.
- Dry & Repeat: Let the first coat dry 24 hours before adding a second for extra depth.
⚠️ Pro Tip: Practice on a test canvas first! Temperature and humidity affect drying times.
5 Mistakes That Ruin the Varnishing Experience
Avoid these pitfalls to ensure your masterpiece stays stunning:
- Varnishing Too Soon: Trapped solvents cause cloudiness. Never rush the cure time.
- Using Cheap Brushes: Shedding bristles ruin smoothness. Invest in a dedicated varnish brush.
- Over-Application: Thick layers crack over time. Thin, even coats win.
- Ignoring UV Protection: Without it, colors fade. Opt for varnishes with UV inhibitors.
- Skipping the Removal Test: Always check removability for future restoration needs.
FAQ: Your Top Varnishing Questions, Answered
Q: Can I varnish acrylic paintings with oil varnish?
A: No! Use acrylic-based varnishes for acrylics to prevent adhesion issues.
Q: Why does my varnish look cloudy?
A: Moisture or cold temperatures during application are likely culprits. Reapply in a dry, warm space.
Q: How do I clean a varnished painting?
A: Gently wipe with a slightly damp cloth. Avoid harsh chemicals.
Conclusion: Varnish—The Unsung Hero of Timeless Art
A well-varnished oil painting isn’t just protected—it’s immortalized. That final glossy, satin, or matte layer elevates your work from a project to a legacy, ensuring colors stay vivid and textures captivating for generations. Whether you’re a seasoned artist or a beginner, mastering the art of varnishing delivers a uniquely satisfying finish that honors your creative vision.
Ready to transform your art? Share your varnishing results with #SatisfyingVarnish—we’d love to see your masterpieces shine!
Meta Description:
Discover why oil painting varnish is the secret to a satisfying finish! Learn how to choose, apply, and protect your masterpieces with pro tips and top product picks.