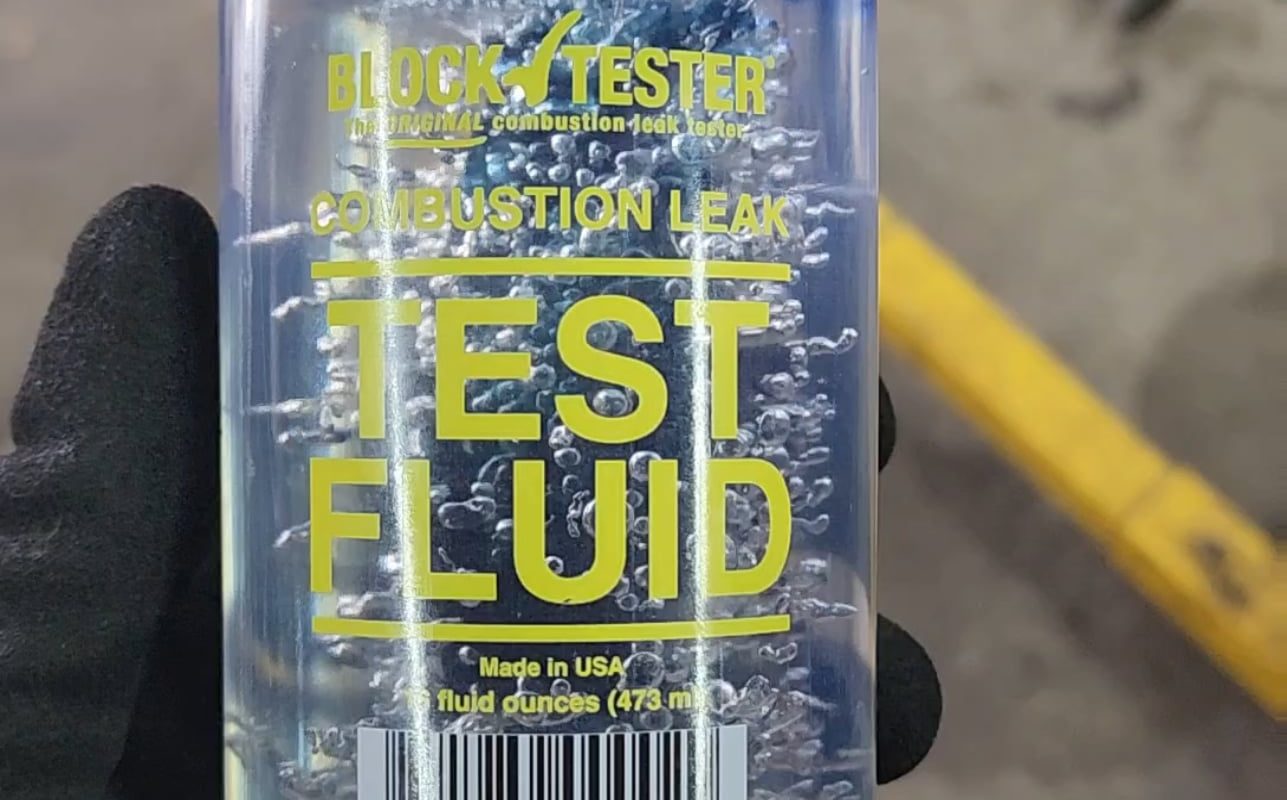
The reactive fluid in this combustion leak tester separated from the water and compressed into the center by the frozen water when I left the bottle in the garage during winter.
Title: Why Your Combustion Leak Tester Failed in Winter (+ How to Fix & Prevent Frozen Fluid Issues!)
Meta Description: Stored your combustion leak tester in the cold? Discover why reactive fluid separates and compresses when frozen, how to salvage it, and winter-proof storage tips!
Introduction
Combustion leak testers are essential for diagnosing head gasket failure or engine coolant contamination. But when temperatures drop, improper storage can cause serious issues—like finding the fluid violently separated, compressed into a gel-like ball in the center of the bottle, surrounded by frozen water. If this happened to you, here’s the science behind the freeze, how it ruins accuracy, and critical steps to salvage or prevent it.
Why Did My Combustion Leak Tester Fluid Freeze and Separate?
Most combustion leak testers use a reactive fluid (often bromothymol blue) dissolved in water. When left in sub-zero conditions (e.g., a garage in winter), two things happen:
-
Water Expands as It Freezes:
Water crystallizes at 32°F (0°C), expanding by 9%. This forces the denser reactive fluid inward, compressing it into a concentrated “blob” in the center. -
Fluid Layers Separate by Density:
Reactive chemicals often have different densities than water. Freezing accelerates phase separation, creating distinct frozen water and a solidified, unusable chemical core.
The Risks: How Freezing Destroys Tester Accuracy
- False Negatives/Positives: Compressed, separated fluid won’t react properly with exhaust gases (like CO₂), giving unreliable results.
- Permanent Chemical Breakdown: Some reactive fluids lose potency after freezing/thawing cycles.
- Bottle Damage: Expanding ice can crack plastic test chambers, causing leaks.
How to Salvage a Frozen Combustion Leak Tester
- Thaw Slowly: Move the tester indoors (room temperature). DO NOT microwave or use hot water—rapid heating degrades the fluid further.
- Shake Vigorously: Once thawed, shake for 2–3 minutes to re-mix the fluid layers.
- Test Before Use: Check on a known-good engine or use fresh fluid as a control. If color changes seem sluggish or inconsistent, replace the fluid.
- Inspect for Damage: Cracks or cloudiness in the plastic? Time for a new tester.
Winter-Proof Storage: 5 Tips to Prevent Freezing
- Store Indoors: Keep testers in climate-controlled spaces (above 40°F / 4°C).
- Use Insulated Storage: Place in a foam-lined toolbox or thermal bag if garage storage is unavoidable.
- Check Fluid Specifications: Some testers use antifreeze-enhanced fluids—upgrade if you live in cold climates.
- Empty After Use: For long-term winter storage, drain fluid into a sealed, indoor container.
- Position Vertically: Store upright to minimize surface area exposed to cold air.
When to Replace vs. Repair
- Replace if: Fluid remains separated after thawing/shaking, the plastic is warped/cracked, or test results seem erratic.
- Repair Option: Some professional-grade testers allow fluid replacement. Purchase OEM fluid only—generic substitutes ruin calibration.
Key Takeaways
- Freezing separates combustion tester fluid via water expansion and density differences.
- Always store testers above freezing temps or use antifreeze models.
- Thaw slowly, shake well, and validate accuracy before trusting results.
Protect your diagnostics toolkit! Proper storage saves money, time, and prevents critical misdiagnoses. For extreme cold, consider antifreeze-based testers (like the Block Tester Hi-Temp Antifreeze Formula) and always prioritize indoor winter storage.
Rank This Article: Found it helpful? Share or bookmark for seasonal tool maintenance tips! Comment below with your cold-weather diagnostic horror stories. 🔧❄️