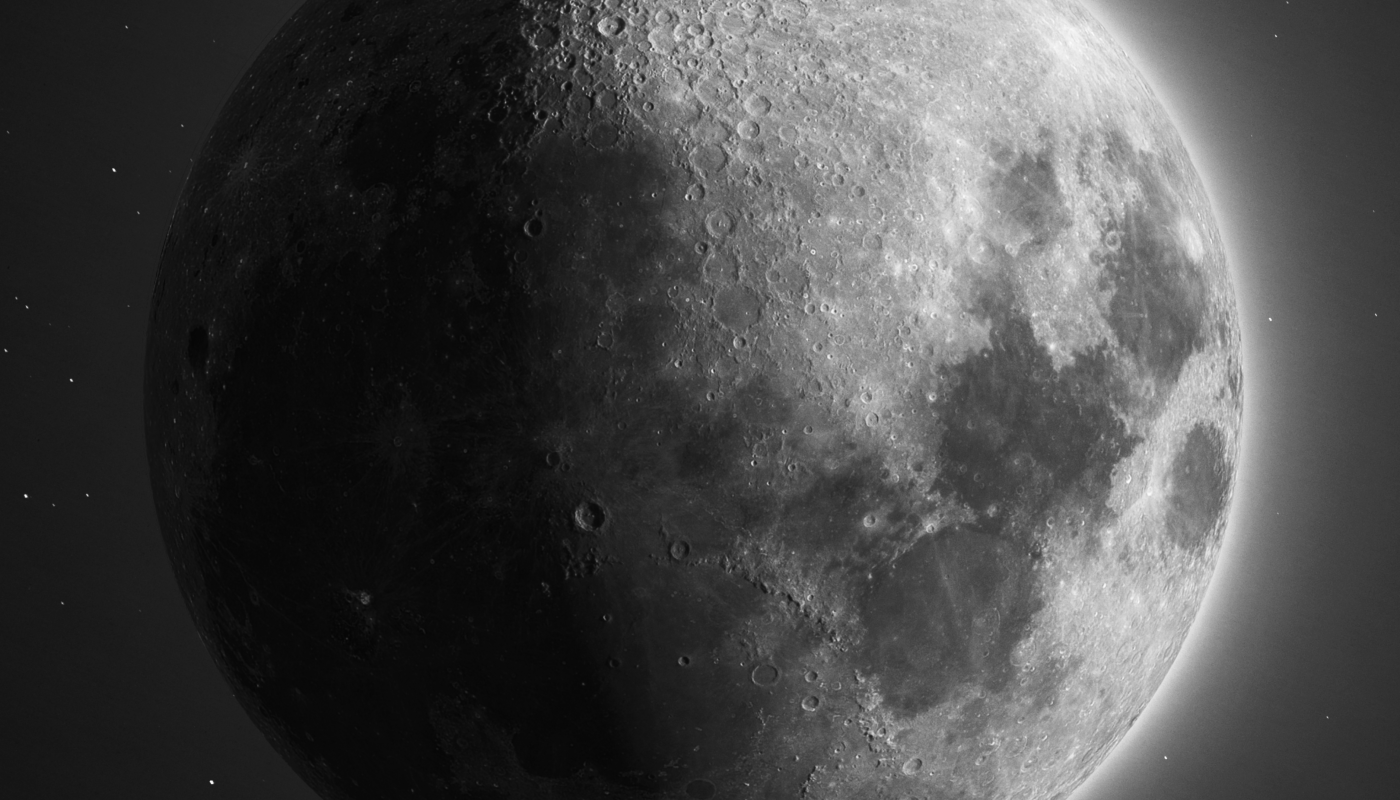
Didn’t expect my first HDR Moon to look like this…
Title: “Didn’t Expect My First HDR Moon to Look Like This… Lessons Learned from an Overambitious Shoot”
Meta Description: Capturing the moon in HDR sounded easy—until my first attempt looked surreal. Discover practical tips, common mistakes, and how to fix a blown-out or unnatural lunar photo.
Introduction
You planned for weeks. You bought the gear, studied tutorials, and waited for the perfect clear night. Then, after hours of setup, your first HDR moon photo looks… off. Instead of the crisp, natural moon you envisioned, it’s glowing like a radioactive marble—oversharpened, overly contrasty, or flattened into an artificial mess. Sound familiar?
You’re not alone. High Dynamic Range (HDR) photography promises to balance the moon’s bright surface with the dark sky, but executing it flawlessly is trickier than influencers make it seem. In this guide, I’ll break down why your HDR moon might look unnatural and how to salvage—or reshoot—for jaw-dropping results.
Why HDR Moon Photography Is Deceptively Hard
The moon’s surface is 15x brighter than the surrounding night sky, forcing your camera to choose between blown-out highlights or pitch-black emptiness. HDR theoretically solves this by blending multiple exposures, but lunar photography adds unique challenges:
- Movement: The moon moves faster than you think! Even slight shifts between exposures cause ghosting.
- Atmospheric Distortion: Turbulence (aka “seeing”) blurs details, especially near the horizon.
- Overprocessing: Aggressive tone-mapping creates a “plastic” look.
What Went Wrong with My First HDR Moon Attempt
(Personal anecdote for relatability)
I used a Nikon D850, 200-500mm lens, and a sturdy tripod. Confident after YouTube tutorials, I shot a 5-exposure bracket (-3 to +3 EV). But my merged HDR looked like a CGI prop:
- Crushed Shadows: The sky turned gray, not black.
- Halos: Glowing edges around the moon’s rim.
- Flat Texture: Lunar details looked smudged.
Turns out, I’d made 3 critical mistakes:
- Poor Exposure Range: My darkest shot still overexposed the moon.
- Auto-Alignment Fail: Photoshop couldn’t correct the moon’s movement between shots.
- Sliders to the Max: I cranked clarity and dehaze, creating artificial contrast.
How to Fix (or Avoid) a Bad HDR Moon Photo
1. Shoot Smarter Brackets
- Expose for Highlights First: Take a single shot exposing the moon’s surface correctly (ISO 100-400, f/8-11, 1/125-1/250s). Then take darker frames for the sky.
- Skip Extreme Brackets: +/-1 or 2 EV is often enough. Too much range introduces noise.
- Use Continuous Shooting Mode: Minimize lunar movement between frames (shoot within 1-2 seconds).
2. Align Manually in Post
Automated HDR software (Lightroom, Aurora HDR) often fails with moving subjects. Instead:
- Layer and Align in Photoshop: Open bracketed shots as layers → “Auto-Align Layers” → Mask manually for precision.
- Try Starry Landscape Stacker: (Mac only) Handles celestial movement better.
3. Edit with Restraint
- Avoid Presets: Moon HDR needs subtlety. Dial back dehaze, clarity, and saturation.
- Prioritize Luminance: Adjust highlights/shadows selectively—target the moon, not the sky (use radial filters).
- Dodge Noise Reduction: High ISO shots? Use Topaz DeNoise AI before merging HDR.
When NOT to Use HDR for Moon Photography
Sometimes, single-exposure shots outperform HDR:
- Bright Moon Phases: A full moon is bright enough to capture detail in one shot.
- High-End Sensors: Cameras like the Sony A7IV or Canon R5 handle dynamic range well natively.
- Time-Blended Composites: Shoot the moon and foreground separately, then blend manually.
Tools That Saved My Lunar Shots
- Tripod & Trigger: A remote shutter avoids shake (even mirror slap ruins sharpness).
- PIPP (Planetary Imaging PreProcessor): Free software to center/align moon shots.
- Affinity Photo: Cheaper than Photoshop, with excellent HDR and focus-stacking tools.
Conclusion: Embrace the Learning Curve
My first HDR moon was a hot mess, but it taught me more than any “perfect” shot ever could. Lunar photography rewards patience—and resisting the urge to overcook edits. Remember:
“The moon’s beauty lies in its subtlety. HDR should reveal, not reinvent.”
Your Turn: Ever had a moon photo disaster? Share your story below—let’s laugh and learn together!
SEO Keywords: HDR moon photography, overprocessed moon photo fix, realistic moon editing, bracketing lunar photography, HDR mistakes astrophotography