Spin art with whiteboard and potters wheel
Spin Art Magic: Transform Whiteboards & Potter’s Wheels into Mesmerizing Masterpieces
Meta Title: Spin Art with Whiteboards & Potter’s Wheels | Easy DIY Techniques & Ideas
Meta Description: Discover how to create stunning spin art using a whiteboard or potter’s wheel! Step-by-step guide, creative techniques, and tips for mesmerizing abstract designs.
Introduction
Spin art is a vibrant, dynamic art form that captivates kids and adults alike. Traditionally associated with handheld spinners or machines, you can elevate this technique with unexpected tools: whiteboards and potter’s wheels! These surfaces offer smooth, large-scale canvases for unique spin art creations. In this guide, you’ll learn how to harness their power to make jaw-dropping abstract art affordably and safely.
Why Whiteboards & Potter’s Wheels Work for Spin Art
Both tools provide a rotating flat surface, allowing centrifugal force to spread paint into hypnotic patterns.
- Whiteboards: Affordable, non-porous, and easy to clean. Perfect for classrooms or quick projects.
- Potter’s Wheels: Delivers controlled, high-speed rotation for professional-grade results. Ideal for detailed work.
Section 1: Whiteboard Spin Art ✨
Materials Needed:
- A manual or electric whiteboard easel (or a DIY turntable)
- Liquid acrylic paint or washable tempera
- Pipettes, squeeze bottles, or brushes
- Water and paper towels for cleanup
Step-by-Step Guide:
- Secure the Whiteboard: Mount it vertically or horizontally on a stable surface. If using a wall-mounted board, tilt it slightly to let excess paint drip.
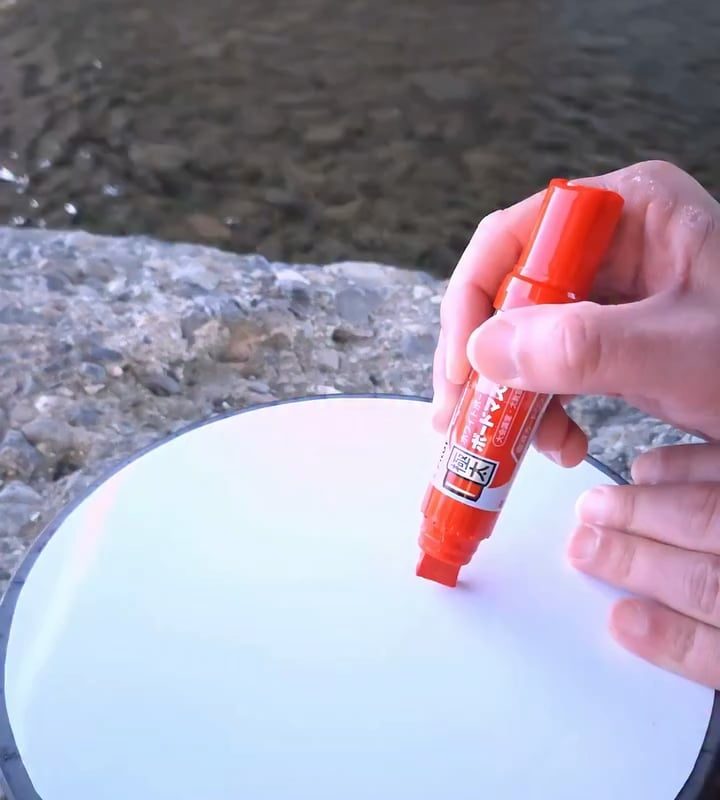
- Add Paint: Spin the board slowly. Drop paint onto the surface—start near the center for radial designs or the edges for wilder splatters.
- Layer Colors: Add 2–3 colors successively while spinning. Overlapping creates mesmerizing swirls!
- Stop & Dry: Let the board slow/stop naturally. Carefully blot pooling paint with paper towels.
Pro Tips:
- Use whiteboard markers for line-based spin art (trace shapes while spinning).
- Create negative space art by placing stickers before painting, then peeling them off post-spin.
Section 2: Potter’s Wheel Spin Art 🌀
Materials Needed:
- A pottery wheel (electric, speed-adjustable)
- Watercolor paper, canvas, or ceramic bisque
- Fluid acrylics or underglazes (for ceramics)
- Palette knives or spoons for paint application
Step-by-Step Guide:
- Prepare the Surface: Tape paper/canvas to the wheel head. For ceramics, center a bisque-fired piece.
- Set the Speed: Start slow (100–200 RPM). Gradually increase to 300–500 RPM for finer patterns.
- Apply Paint: Drizzle paint in thin streams or tap brushes for splatter effects. Tilt tools to “throw” pigment outward.
- Refine & Seal: Stop the wheel to touch up details. Seal paper/canvas with spray varnish; fire ceramics per glaze instructions.
Pro Tips:
- Try “reverse spin art”: Paint solid shapes, then spin to stretch them into streaks.
- Mix metallic paints with matte colors for galaxy-like depth.
Creative Variations to Try
- Spin Art Transfers: Press paper onto a painted whiteboard mid-spin for textured monoprints.
- 3D Effects: Add glue or mod podge before spinning—sprinkle glitter or sand for tactile art.
- Hybrid Spin & Hand-Painting: Spin first, then embellish dried art with pens or collage.
FAQs
Q: Can I use a DIY spinner instead?
A: Yes! Attach a whiteboard or plywood disc to a lazy Susan or drill-powered turntable.
Q: Best paints for no-mess spin art?
A: Tempera or washable acrylics clean easily off whiteboards. For pottery wheels, use non-toxic fluids.
Q: How to prevent over-saturation?
A: Start with small paint amounts. You can always add more!
Conclusion
Spin art doesn’t require expensive gadgets—whiteboards and potter’s wheels unlock endless creative potential. Whether crafting with kids or producing gallery-worthy pieces, these techniques blend science and art into unforgettable creations. Share your spin art experiments with #SpinArtMagic!