An expert makes wallpaper seams completely disappear
Title: The Expert Guide to Making Wallpaper Seams Completely Disappear
Achieving a flawless wallpaper finish is an art, and nothing ruins the illusion of seamless elegance more than visible seams. While DIY enthusiasts often struggle with this common issue, professional installers have mastered techniques to make seams vanish. In this guide, we reveal the trade secrets experts use to create a smooth, continuous look—no trace of seams allowed.
Why Do Wallpaper Seams Become Visible?
Visible seams occur due to:
- Poor alignment during installation
- Shrinkage as wallpaper adhesive dries
- Insufficient adhesive or uneven application
- Low-quality materials that fray or warp
- Environmental factors (humidity, temperature changes)
Experts combat these issues through meticulous preparation, precision application, and specialized tools.
Tools & Materials Pros Use to Eliminate Seams
- High-Quality Wallpaper: Choose thicker, non-woven options (easier to align and less prone to shrinking).
- Seam Roller: A narrow, hard roller smoothes edges without crushing the pattern.
- Sharp Utility Knife: For razor-clean cuts (replace blades frequently).
- Premium Adhesive: Match adhesive type to wallpaper material (e.g., vinyl adhesive vs. paste-the-wall).
- Seam Sealer: A clear, water-based glue to tack down lifting edges.
- Tack Cloth: Removes dust before overlapping seams.
Step-by-Step: Expert Techniques for Invisible Seams
1. Preparation is Everything
- Clean & Prime Walls: Fill cracks, sand uneven surfaces, and apply primer for better adhesion.
- Measure & Plan Layout: Avoid seams near corners or focal points. Roll out multiple strips pre-cut to room height + 4 inches.
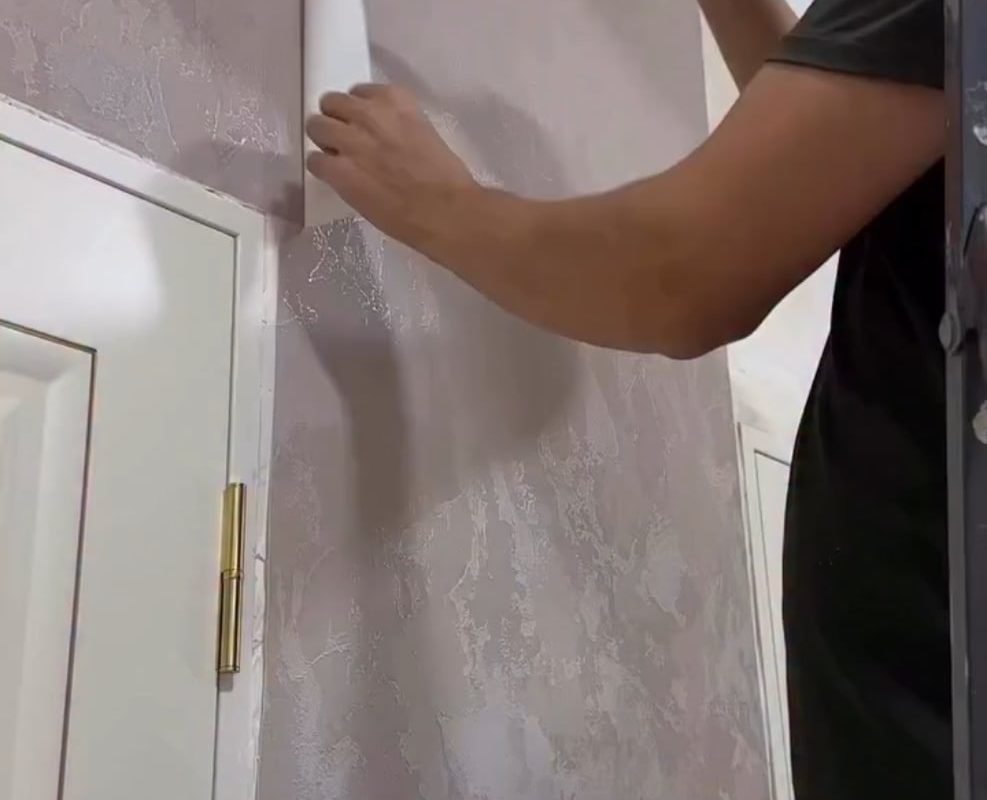
2. Master the “Butt Joint” Technique
- Align Patterns First: Match designs on a flat surface before hanging.
- Overlap, Then Trim: Overlap adjacent strips by 1/8 inch, then slice through both layers with a straightedge. Discard excess for a perfect butt joint.
3. Adhesive Management
- Apply Evenly: Use a paint roller for uniform adhesive coverage (no dry spots!).
- Book It Right: Fold pasted sides together (“booking”) to relax fibers before hanging.
4. Seam Smoothing Like a Pro
- Press, Don’t Rub: Gently smooth from center outward with a plastic smoother.
- Roll Seams Immediately: Apply firm pressure with a seam roller—once, not repeatedly.
5. Final Touches
- Wipe Excess Adhesive: Use a damp sponge before it dries.
- Seal Stubborn Edges: Dab seam sealer under any lifting edges with a fine brush.
Pro Tips for Trouble-Free Results
- Work Away From Light Sources: Seams are less noticeable when shadows don’t highlight edges.
- Humidity Control: Run a dehumidifier to prevent shrinkage in humid climates.
- Slow Drying = Better Bonding: Avoid fans/AC directly blowing on fresh wallpaper.
- Use Distilled Water: Prevents mineral deposits that weaken adhesive.
Fixing Existing Seams: Quick Expert Fixes
If seams reappear after installation:
- Re-adhere: Lift the seam, apply adhesive with a syringe, and re-roll.
- Use a Heat-Activated Patch: Apply double-sided tape and press with a warm iron (test heat tolerance first).
- Camouflage with Paint: For textured wallpaper, dab matching acrylic paint on frayed edges.
When to Call a Professional
While DIY saves money, complex patterns (like damask or large repeats) or delicate materials (grasscloth, silk) warrant hiring an expert. Professional installers charge $35–$50/hour but guarantee seam-free perfection.
Final Thought: Invisible seams rely on patience, precision, and practice. Even pros accept that perfection takes time—don’t rush the process. With these techniques, your walls will look like a continuous canvas of artistry, not a patchwork of mistakes.
Tags: #WallpaperInstallation #HomeImprovement #DIYHomeDecor #WallpaperSeams #InteriorDesignTips