Carving the Outline of a Check Mark Out of Wood
Carving the Outline of a Check Mark Out of Wood: A Step-by-Step Guide
Introduction
Wood carving is a timeless craft that blends creativity and precision. For beginners and seasoned woodworkers alike, carving simple shapes like a check mark (✓) is a great way to hone foundational skills. In this guide, you’ll learn how to carve a clean, professional-looking check mark out of wood—perfect for custom signs, decorative elements, or organizational tools.
Why Carve a Check Mark?
Check marks are universally symbolic, representing completion, correctness, or approval. A carved wooden check mark can be used for:
- Home decor: Wall hangings, rustic signs, or motivational pieces.
- Functional labels: Marking completed tasks on a wooden planner or calendar.
- Gifts or awards: A unique token of achievement for colleagues, students, or loved ones.
Materials & Tools You’ll Need
- Wood block: Softwoods like pine, basswood, or balsa are ideal for beginners.
- Carving knife or chisels: A sharp whittling knife or small gouge chisel for detail work.
- Sandpaper: Multiple grits (120 to 400) for smoothing edges.
- Pencil and ruler: For sketching the design.
- Safety gear: Cut-resistant gloves and protective eyewear.
- Optional: Wood stain, paint, or varnish for finishing.
Step-by-Step Carving Process
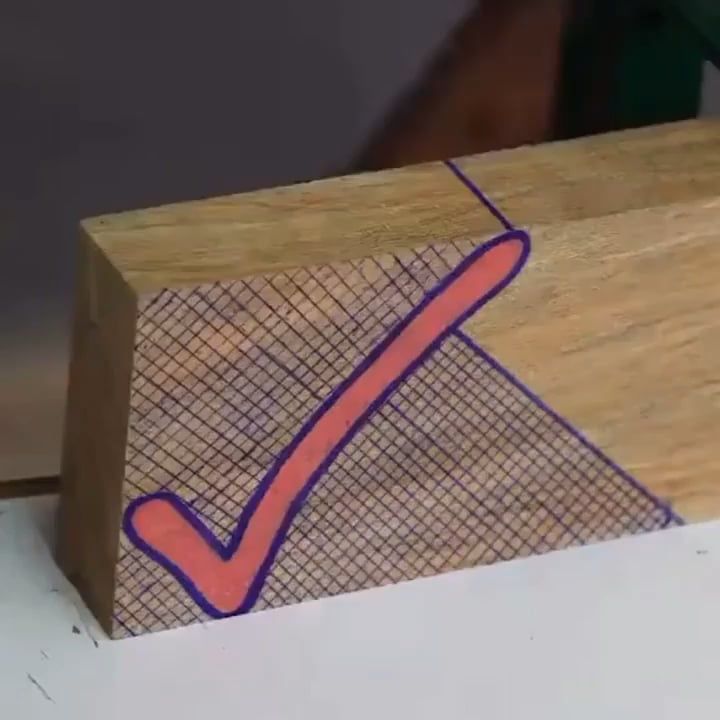
1. Design and Transfer
- Sketch your check mark on paper first. Aim for bold, clean lines—avoid overly intricate curves if you’re new to carving.
- Transfer the design onto your wood block using a pencil. Lightly mark the outline and any angles.
2. Secure the Wood
- Clamp the wood block firmly to a workbench. This prevents slipping and minimizes the risk of accidental cuts.
3. Rough Out the Shape
- Make relief cuts: Use your knife or chisel to score shallow lines along the check mark’s outline. These guide deeper cuts.
- Remove excess wood: Carve away material outside the outline at a 45-degree angle, working toward your pencil marks.
4. Refine the Edges
- Gradually deepen your cuts to create a clear outline. Rotate the wood as needed for better control.
- For angular designs (e.g., a check mark with straight lines), use a V-tool or chisel to sharpen corners.
5. Sand Smooth
- Start with coarse sandpaper (120–220 grit) to eliminate rough spots. Progress to finer grits (300–400) for a polished finish.
- Avoid oversanding curved edges to preserve the check mark’s shape.
6. Finishing Touches
- Stain or paint: Apply wood stain for a natural look, or acrylic paint for bold contrast.
- Seal: Protect your piece with a clear sealant (e.g., polyurethane) if it’ll be handled frequently or displayed outdoors.
Tips for Success
- Sharpen tools frequently: A dull blade makes carving harder and increases injury risk.
- Patience is key: Work incrementally—removing too much wood at once can lead to errors.
- Practice on scrap wood: Test your technique before carving the final piece.
Safety Reminders
- Always carve away from your body.
- Keep your non-dominant hand clear of the blade path.
- Work in a well-lit, clutter-free space.
Final Thoughts
Carving a check mark is an accessible project that builds confidence in fundamental woodworking skills. With practice, you can experiment with scaling, embellishments (such as floral accents around the check), or even 3D reliefs. Document your process, share your results, and enjoy the satisfaction of creating a functional, handcrafted piece!
Keywords: wood carving, DIY check mark, wood carving for beginners, how to carve wood, simple wood projects, woodworking tutorial, hand-carved decor.
Meta Description: Learn how to carve a precise wooden check mark in six easy steps! Perfect for DIY decor, labels, or gifts—this guide covers tools, safety, and finishing tips. Start your woodworking journey today.