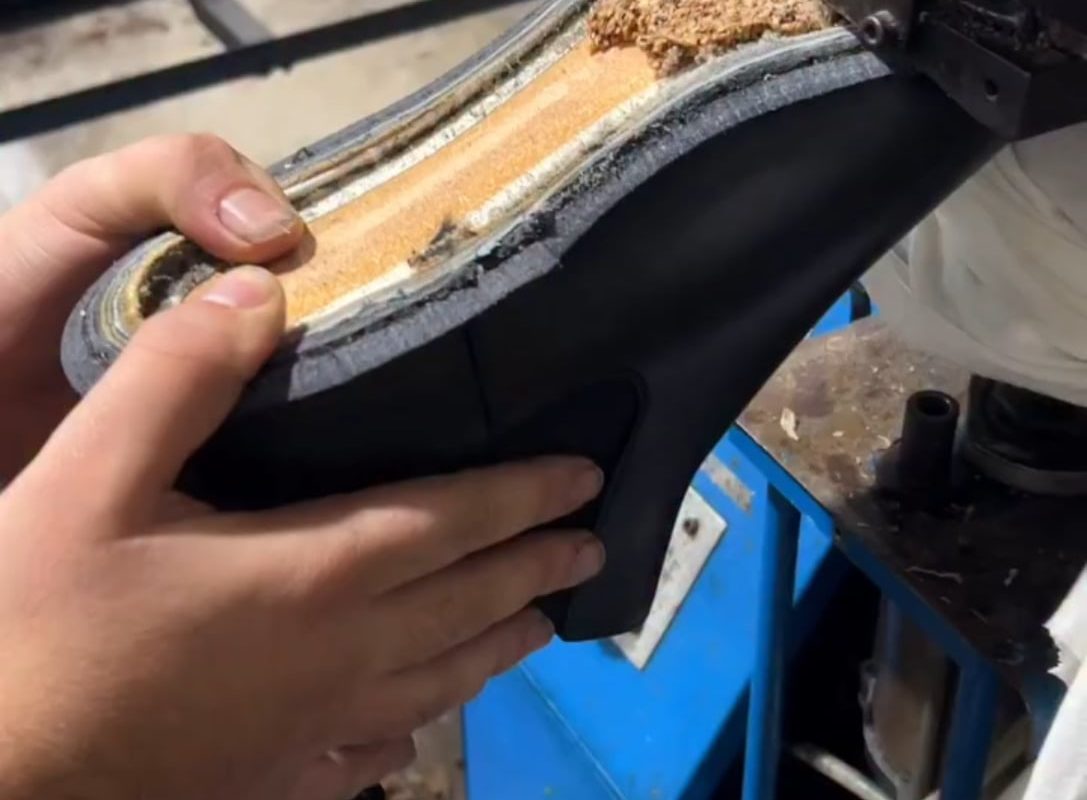
Filling a shoe sole with cork
Title: Step-by-Step Guide: How to Fill Shoe Soles with Cork for Ultimate Comfort & Support
Meta Description: Discover how to fill shoe soles with cork for eco-friendly comfort, arch support, and durability. A DIY guide to revitalizing your favorite footwear!
Introduction
Are your shoes losing their cushioning, or do you crave the orthopedic benefits of cork soles without the premium price tag? Filling shoe soles with cork is an innovative, eco-friendly DIY solution that merges sustainability with ergonomic comfort. Cork is a lightweight, resilient, and natural material prized for its shock absorption, moisture resistance, and moldability—making it ideal for customizing footwear. In this guide, you’ll learn why cork is a game-changer for soles, how to perform the repair yourself, and the long-term benefits of upgrading your shoes.
Why Choose Cork for Shoe Soles?
Before diving into the process, understand why cork stands out:
- Comfort & Support: Cork molds to your foot’s shape over time, providing personalized arch support and reducing strain.
- Durability: It’s resistant to compression, meaning it won’t flatten like foam or gel inserts.
- Eco-Friendly: Cork is renewable, biodegradable, and harvested from cork oak trees without harming them.
- Temperature Regulation: Insulates against heat in summer and cold in winter, perfect for year-round wear.
Materials You’ll Need
- Cork granules (coarse or fine, depending on desired density)
- Sole adhesive (like EVA glue or shoe-specific contact cement)
- A clean, hollow shoe sole (e.g., sandals or shoes with removable insoles)
- Funnel or syringe for precise filling
- Clamps or heavy books to apply pressure while drying
- Sandpaper (medium grit for finishing)
- Protective gloves & mask (for safety during application)
Step-by-Step Guide to Filling Shoe Soles with Cork
1. Prepare the Shoe
- Remove the existing insole if possible, or clean the sole cavity thoroughly with rubbing alcohol.
- Ensure the area is dry and free of dirt or debris for maximum adhesive effectiveness.
2. Mix Cork Granules with Adhesive
- Combine cork granules with your chosen sole adhesive (follow packaging instructions for ratios).
outgoing->Pro Tip: Use a 2:1 ratio of cork to glue for a firm but flexible mixture.
3. Fill the Sole Cavity
- Using a syringe or funnel, carefully inject the cork-adhesive blend into the sole’s hollow compartment.
- Fill until slightly overfilled to account for settling during drying.
4. Level & Compress
- Press down firmly with a flat object (like a spoon or spatula) to eliminate air pockets.
- Ensure the surface is flush with the shoe’s edges for a seamless finish.
5. Let It Cure
- Place clamps or heavy books atop the shoe and let it dry for 24–48 hours in a ventilated area.
outgoing->Note: Avoid walking during this phase—premature use weakens adhesion.
6. Sand & Finish
- Once dry, sand the cork surface lightly to smooth rough edges or excess material.
- Reattach the insole or add a fabric liner if desired for comfort.
Common Mistakes to Avoid
- Skipping the Cleaning Step: Grease or dust compromises adhesion.
- Wrong Adhesive: Use flexible glue designed for footwear—rigid glues crack under pressure.
- Overfilling: Excess cork can cause uneven wear or discomfort.
Maintenance & Longevity
- Cork-filled soles last 2–3 years with regular use. Reapply adhesive if layers separate.
- Avoid prolonged exposure to water (though cork is water-resistant).
- Refresh with a sanding session if surfaces become uneven.
Eco-Friendly Perks Beyond Comfort
By repurposing shoes with cork, you:
- Reduce Waste: Extend the life of shoes instead of discarding them.
- Minimize Carbon Footprint: Cork is carbon-negative (traps more CO₂ than harvesting emits).
FAQs
Q: Can cork filling work on any shoe?
A: Best for sandals, moccasins, or shoes with hollow soles (like Birkenstock-style designs). Running shoes may need professional injection.
Q: Is this cheaper than buying cork soles?
A: Yes! A $15 bag of cork granules can refurbish multiple pairs.
Q: How long until the cork molds to my feet?
A: Roughly 1–2 weeks of regular wear.
Conclusion
Filling shoe soles with cork transforms worn-out footwear into customized, planet-friendly comfort machines. Whether you’re reviving old favorites or experimenting with sustainable fashion, this DIY project delivers unparalleled support while reducing landfill waste. Try it today—your feet (and the planet) will thank you!
Need more upcycling ideas? Explore using cork for DIY coasters, flooring, or even yoga blocks!
Keywords: cork shoe soles, DIY shoe repair, cork insole filling, sustainable footwear, eco-friendly shoes, cork sole benefits, how to fill shoe soles, cork granule DIY.