Headlight restoration
The Ultimate Guide to Headlight Restoration: Safety, Savings, and Shine
Dim, yellowed, or foggy headlights don’t just hurt your car’s appearance—they compromise your safety on the road. Over time, UV rays, debris, and oxidation degrade plastic headlight lenses, reducing brightness by up to 50%. Fortunately, headlight restoration is a cost-effective DIY solution that can restore clarity and visibility in under two hours. In this guide, we’ll cover why restoration matters, step-by-step methods, and expert tips for lasting results.
Why Restore Your Headlights?
- Safety First: Cloudy headlights scatter light, reducing nighttime visibility and increasing accident risks.
- Avoid Costly Replacements: New headlight assemblies cost $200–$1,500+, while restoration kits run $20–$50.
- Boost Resale Value: Clear headlights enhance your vehicle’s aesthetics and appeal to buyers.
What Causes Headlight Damage?
- UV Oxidation: Sunlight breaks down the protective urethane coating, causing yellowing.
- Road Debris: Sand, gravel, and chemicals create tiny scratches.
- Moisture: Condensation inside the housing accelerates fogging.
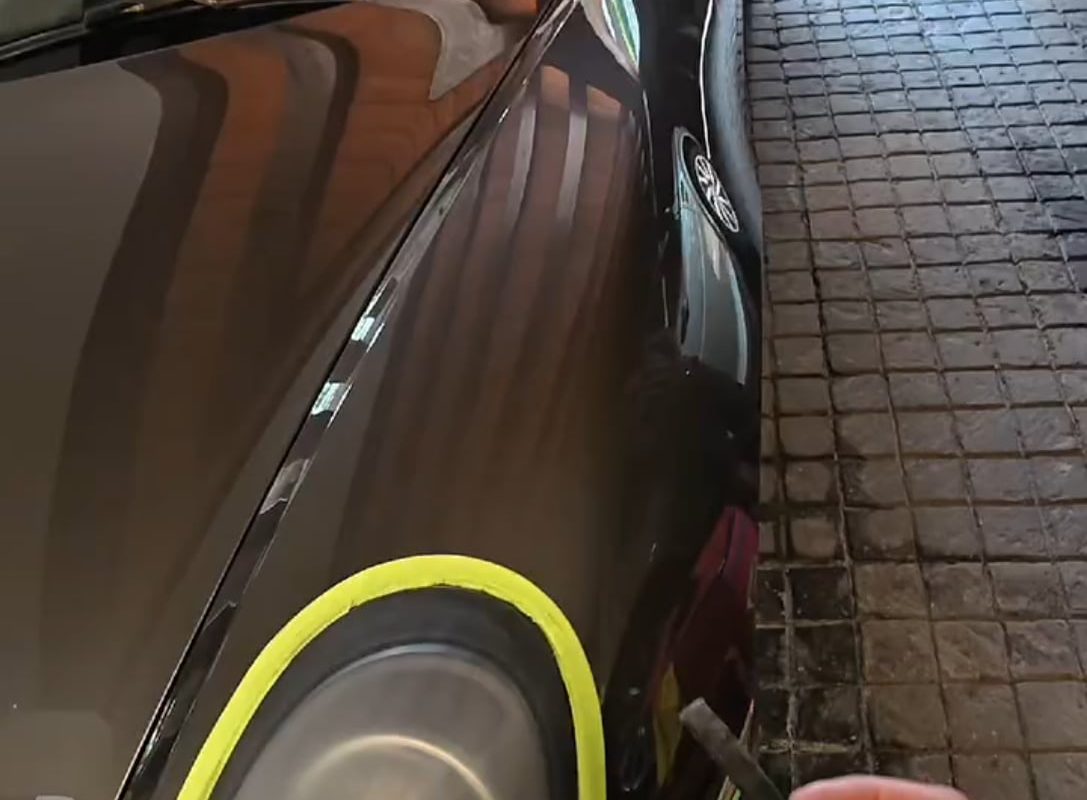
DIY Headlight Restoration in 6 Steps
Tools Needed: Headlight restoration kit (e.g., Meguiar’s or 3M), microfiber cloths, masking tape, water spray bottle, UV sealant.
-
Prep the Area
- Wash headlights with soapy water.
- Tape off surrounding paint to avoid scratches.
-
Sand Away Damage
- Start with 600-grit sandpaper (wet sanding) to remove oxidation.
- Progressively use finer grits (1,000 → 3,000) for a smooth finish.
-
Polish the Lens
- Apply a plastic polishing compound in circular motions using a buffing pad.
- Wipe clean with a microfiber cloth.
-
Apply UV Sealant
- Protect restored lenses with a UV-resistant clear coat (e.g., Cerakote). This prevents re-yellowing.
-
Final Buff
- Gently polish the surface for a glass-like shine.
-
Test Visibility
- Turn on your headlights to check beam focus and brightness.
Professional Restoration vs. DIY: Which is Better?
| Factor | DIY Restoration | Professional Service |
|---|---|---|
| Cost | $20–$50 (kit) | $100–$150 |
| Time | 1–2 hours | 30–60 minutes |
| Longevity | 1–2 years (with sealant) | 2–3+ years |
| Skill Required | Moderate | None |
Tip: DIY kits are ideal for minor oxidation, while professionals handle severe damage or internal moisture.
Pro Tips for Long-Lasting Results
- Avoid Harsh Cleaners: Ammonia-based sprays degrade lenses faster. Use pH-neutral formulas.
- Apply Wax Quarterly: Automotive wax adds a protective barrier against UV rays.
- Park in Shade: Minimize sun exposure to slow oxidation.
When to Replace Instead of Restore
Restoration won’t fix:
- Deep cracks or chips.
- Internal wiring/ballast issues.
- Waterlogged housing (condensation pooling inside).
Conclusion
Headlight restoration is a simple, budget-friendly way to reclaim your safety and your car’s sleek look. With the right tools and techniques, you can achieve professional-grade clarity at home. Don’t let foggy lights dim your drive—take action today to shine brighter and safer on the road.
Need Help? Share your headlight challenges in the comments, or explore our top-rated [headlight restoration kit] recommendations!
SEO Keywords: Headlight restoration, DIY headlight restoration, restore cloudy headlights, headlight restoration kit, how to clean headlights, cost of headlight restoration, professional headlight restoration, UV headlight sealant.
(Meta Description: Restore cloudy headlights safely and affordably with our step-by-step DIY guide. Learn how UV sealant, sanding, and polishing can save you $100s over replacements!)