Pooling magnets with a string loop
Title: Pooling Magnets with a String Loop: A Simple Hack for Organization & Creativity
Meta Description: Discover how to pool magnets using a string loop for easy storage, creative projects, and STEM experiments. Step-by-step guide, benefits, and FAQs included!
Introduction
Magnets are versatile tools used in everything from DIY crafts to industrial applications. But storing or organizing multiple magnets can be tricky—they cling together chaotically or scatter unpredictably. Enter pooling magnets with a string loop, a clever method to keep magnets tidy, accessible, and ready for use. In this guide, we’ll explain how this technique works, its benefits, and practical applications for hobbyists, teachers, and engineers alike.
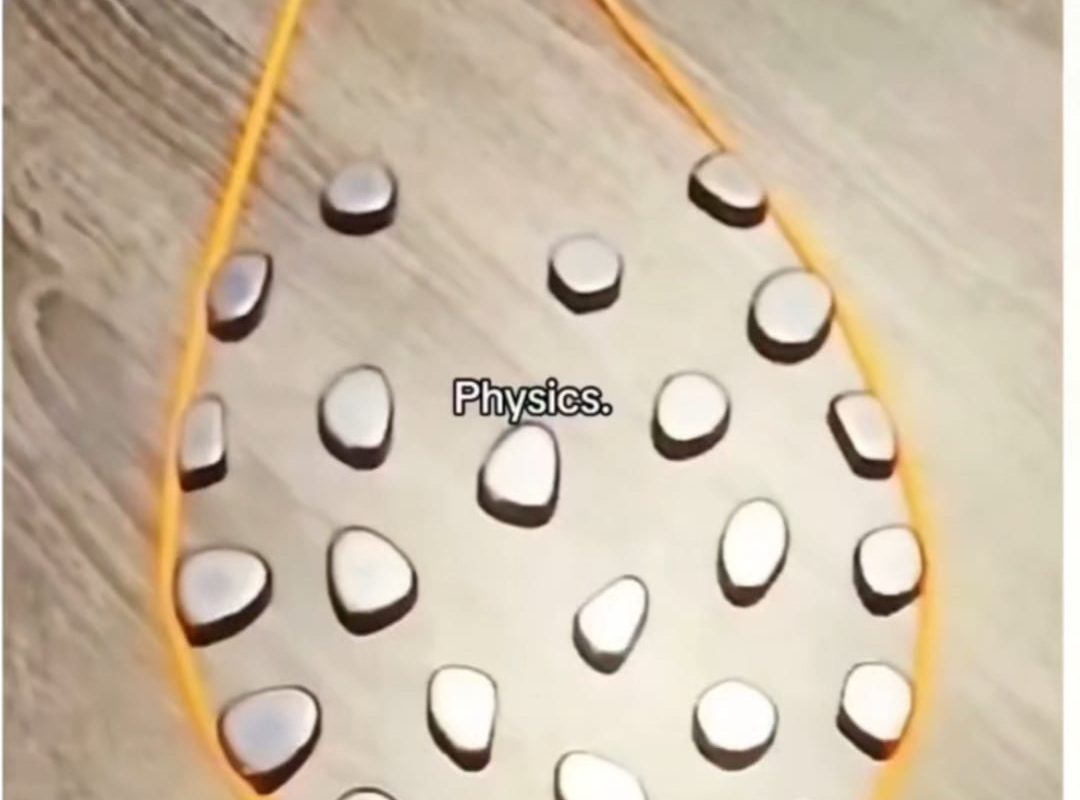
What is “Pooling Magnets with a String Loop”?
“Pooling” magnets refers to grouping them in a controlled arrangement using a looped string. By threading magnets onto a durable string and securing the ends into a loop, you create a customizable chain that prevents magnets from clumping randomly. This setup leverages magnetic attraction to keep the magnets evenly spaced along the string without tangling.
Why Use a String Loop?
- Prevents Scratches: Magnets won’t collide harshly.
- Easy Access: Grab one magnet without disturbing the rest.
- Space-Saving: Hang the loop for compact storage.
- Versatility: Ideal for experiments, art, or tool organization.
How to Pool Magnets with a String Loop: A Step-by-Step Guide
Materials Needed
- Small disc or ring-shaped magnets (with center holes)
- Durable string (nylon, paracord, or thick thread)
- Scissors
- Lighter or glue (to secure knot ends)
- Optional: Beads or spacers for decoration
Steps
- Cut the String: Measure and cut a length of string slightly longer than your desired loop size (e.g., 12–24 inches).
- Thread the Magnets: Slide magnets onto the string one by one, leaving small gaps between them.
- Create the Loop: Tie the string ends together with a secure knot (e.g., double knot or fisherman’s knot).
- Secure the Knot: Use a lighter to melt synthetic string ends or apply glue to prevent fraying.
- Adjust Spacing: Gently nudge magnets apart so they repel slightly, creating an evenly spaced “pool.”
Top Benefits of This Technique
-
Clutter-Free Storage
String loops allow magnets to hang neatly on hooks, rods, or nails—no more digging through drawers! -
STEM Education Applications
Teachers can demonstrate magnetic fields, polarity, and force interactions by letting students manipulate the pooled magnets. -
DIY Projects & Decor
Create magnetic garlands, fridge art displays, or tool holders for workshops. -
Portability
Carry the loop in a toolbox or backpack without losing magnets to chaos.
Creative Uses & Applications
- Crafting: Build magnetic jewelry, wind chimes, or kinetic sculptures.
- Workshops: Pool nuts/bolts for quick access during repairs.
- Science Experiments: Investigate how magnetic forces balance when spaced along a string.
- Home Organization: Hang keys, notes, or lightweight utensils on magnetic loops.
Safety Tips
- Supervise Children: Small magnets pose choking hazards and pinch risks.
- Keep Away from Electronics: Strong magnets can damage phones, credit cards, or pacemakers.
- Use Appropriate Materials: Ensure the string is strong enough to hold the magnets’ weight.
FAQs About Pooling Magnets with a String Loop
Q1: Can I use any type of magnet?
A: Disc or ring magnets with holes work best. Avoid rare-earth magnets if you need lightweight pooling, as they’re exceptionally strong.
Q2: How many magnets can I pool on one loop?
A: It depends on string strength and magnet size. Test with 5–10 magnets first and adjust.
Q3: Will the magnets slide together over time?
A: If spaced properly, magnetic repulsion keeps them apart. Tightening the knot or adding spacers (like beads) helps.
Q4: Can I reuse the string loop?
A: Yes! Untie the knot, add/remove magnets, and retie as needed.
Conclusion
Pooling magnets with a string loop is a brilliant blend of simplicity and ingenuity. Whether you’re decluttering your workspace, teaching physics concepts, or crafting dynamic decor, this method keeps your magnets organized and functional. Try it today—all it takes is a string, a few magnets, and a little creativity!
Optimized Keywords:
Pooling magnets, string loop magnets, organize magnets with string, magnetic storage hack, DIY magnet projects, STEM magnet experiments, how to group magnets.
Image Alt Text Suggestion:
“Pooled disc magnets evenly spaced on a hanging nylon string loop.”
Internal Links (if applicable):
- “10 Creative Magnet Projects for Kids”
- “Guide to Magnetic Storage Solutions”
External Links (if applicable):
Boost your magnet game with this smart hack, and never lose track of these powerful little tools again! 🧲✨