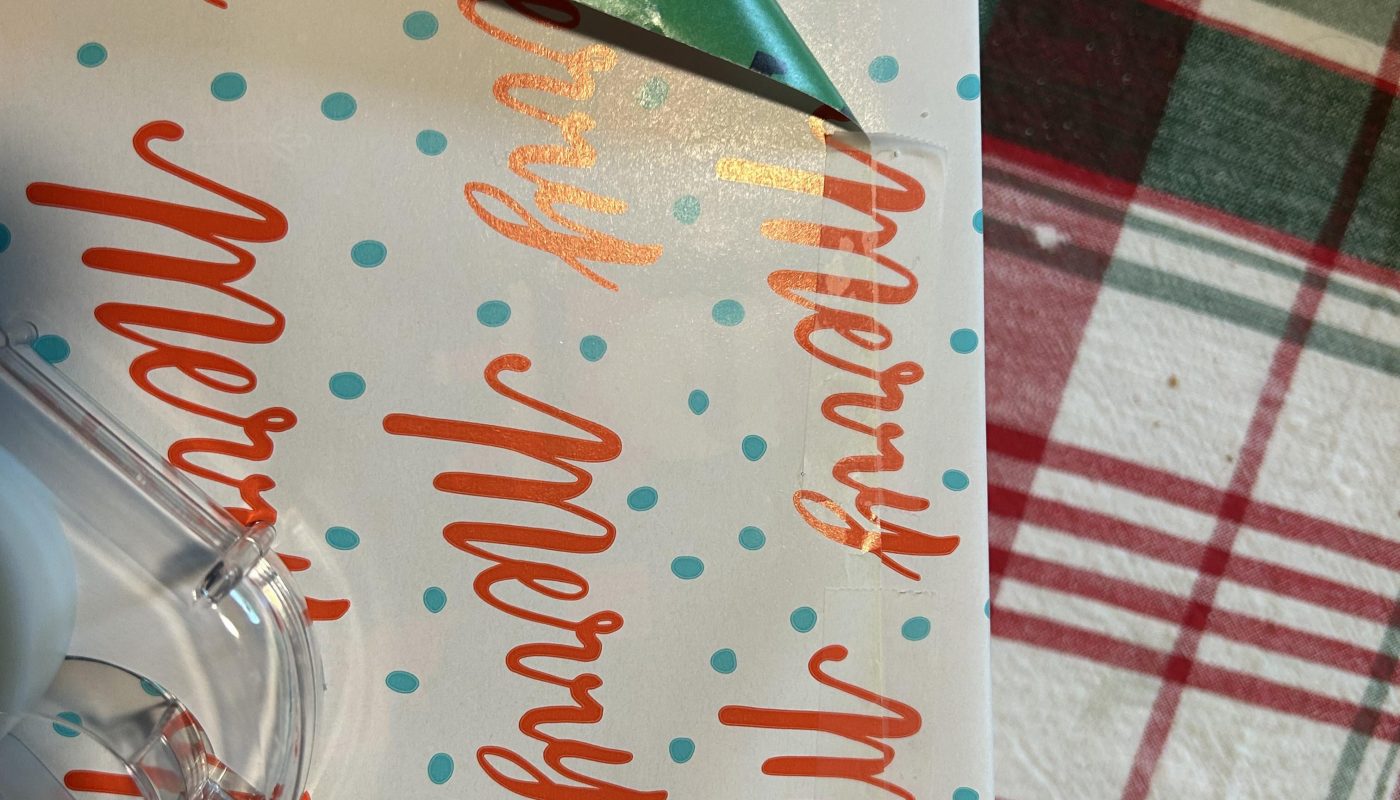
The wrapping paper lines up perfectly.
Title: The Wrapping Paper Lines Up Perfectly: Mastering the Art of Flawless Gift Wrapping
Meta Description: Learn how to make your wrapping paper lines up perfectly every time! Discover expert tips, techniques, and tools for flawless gift presentations that wow.
Introduction
We’ve all been there: carefully wrapping a gift, only to realize the seams are crooked, the patterns don’t align, or the paper ends up looking haphazardly slapped together. But what if your wrapping paper could always line up perfectly—creating sharp edges, seamless patterns, and a polished finish worthy of a professional? Achieving this level of precision isn’t just about patience; it’s about technique. In this guide, we’ll break down the secrets to flawless gift wrapping so you can elevate your presents from “nice” to “unforgettable.”
Why Perfection Matters (Beyond Just Looks)
When wrapping paper lines up perfectly, it transforms a simple gift into a tactile experience. Crisp folds and aligned patterns signal thoughtfulness and care, amplifying the excitement of receiving the gift. For businesses, precision wrapping reinforces brand professionalism, while for personal givers, it adds a layer of artistry. Plus, well-aligned paper reduces waste—no more cutting excess or struggling with uneven seams!
Tools You’ll Need for Precision Wrapping
- High-Quality Wrapping Paper: Opt for sturdy, thick paper with consistent patterns (e.g., grids, stripes, or repeating prints).
- Double-Sided Tape: Keeps seams invisible and edges smooth.
- Sharp Scissors or Rotary Cutter: Clean cuts prevent fraying.
- Ruler or Measuring Tape: Ensures accurate dimensions.
- Cutting Mat or Gridded Surface: Helps align patterns and measure cuts.
Step-by-Step: How to Line Up Wrapping Paper Perfectly
1. Measure Twice, Cut Once
- Unroll your wrapping paper on a flat, gridded surface to visualize the pattern’s repeat.
- Measure your gift’s dimensions and add 2–3 inches to each side to ensure full coverage.
- Cut the paper in straight lines using a rotary cutter (for flawless edges) or scissors guided by a ruler.
Pro Tip: If your paper has directional patterns (like reindeer or holiday motifs), ensure the design faces the right way before cutting!
2. Center the Gift & Align Patterns
- Place your gift face-down on the paper’s wrong side (non-printed side). Position it so patterns align symmetrically along the length and width.
- Fold one side of the paper over the gift, pressing firmly to create a crease. Repeat for the opposite side, ensuring patterns meet seamlessly at the edges. Use double-sided tape to secure.
3. Mastering Seamless Ends
- For the ends, fold the top and bottom flaps like you’re wrapping a present. Before taping:
- Fold each flap inward at a 45° angle to create crisp triangles.
- Align the pattern’s edges as you fold (e.g., continuing a stripe across the seam).
- Secure with double-sided tape.
4. Finishing Touches
- Smooth out air bubbles with a ruler or credit card.
- Use ribbons, twine, or custom tags to accentuate—not distract from—your flawless wrap.
Troubleshooting Common Alignment Mistakes
-
Problem: Patterns don’t match at seams.
Fix: Cut larger paper to allow “buffer space” for adjustments. -
Problem: Paper slips during folding.
Fix: Use small weights (e.g., coins or washi tape) to hold edges in place. -
Problem: Uneven edges.
Fix: Score paper lightly with a ruler before folding.
When It Pays to Go Pro: Printed vs. Solid Wrapping Papers
While solid colors are forgiving, patterned papers—especially stripes, plaids, or geometric designs—benefit most from perfect alignment. For holidays or themed events, invest in paper with “match points” (small markers on the reverse side) to guide your cuts.
Eco-Friendly Precision Wrapping
Make your perfection sustainable too! Choose:
- Recycled or plantable wrap.
- Reusable fabric wraps (furoshiki) with printed guides for knot alignment.
- DIY stamped paper to control pattern spacing.
Wrapping It Up
When your wrapping paper lines up perfectly, it’s more than a gift—it’s a statement. By following these steps, you’ll not only impress recipients but also find joy in the craftsmanship of gift-giving. Remember: practice makes progress. Start with simpler patterns, build your skills, and soon every present you wrap will look like it came from a luxury boutique!
FAQ: Quick Answers
Q: How do I align stripes on wrapping paper?
A: Measure the stripe spacing and use it to guide cuts/folds. Always center the boldest stripe on the gift’s top.
Q: Can I fix misaligned paper after taping?
A: Gently peel back the tape with a toothpick or tweezers, reposition, and reseal.
Q: What if my gift is an odd shape?
A: Use tissue paper as a base layer and wrap sections separately using smaller aligned pieces.
Transform your next gift into a work of art! Bookmark this guide, share it with fellow wrapping enthusiasts, and tag us in your #PerfectlyWrapped creations on social media. Happy wrapping!