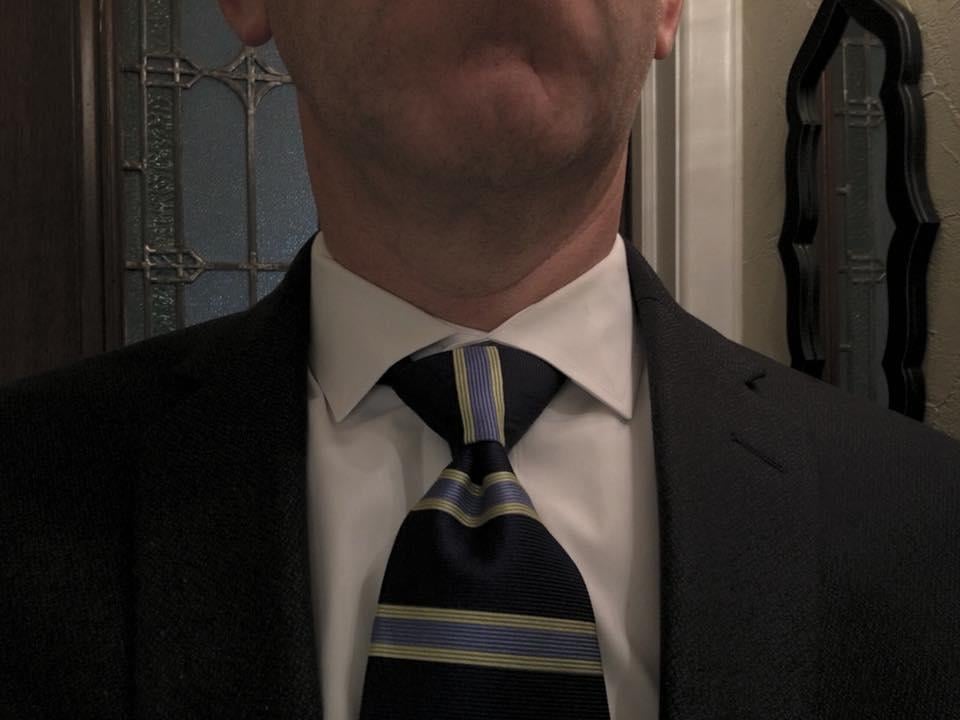
That time I tied the perfect knot in my tie. Stripes lined up perfectly with the knot.
Meta Description: Discover the art of tying the perfect necktie knot with precision—the moment stripes align flawlessly, confidence soars, and your style becomes unforgettable. Step-by-step guide included!
That Time I Tied the Perfect Knot in My Tie: A Tale of Precision, Pride, and Perfectly Aligned Stripes
We’ve all had that one moment when everything comes together—a split-second victory that feels like winning a silent style Olympics. For me, it was the morning I tied my tie and watched the stripes magically align with the knot, creating a seamless, symmetrical masterpiece. It wasn’t just luck—it was technique, patience, and a sprinkle of obsession. Here’s how you can replicate that “perfect knot” magic for yourself.
Why the Perfect Knot Matters More Than You Think
A well-tied tie isn’t just a formality; it’s a nonverbal power move. Studies show sharp dressing boosts confidence and professionalism. But when stripes, patterns, or dimples align with your knot? You elevate from “dressed” to masterfully curated.
The Anatomy of Flawless Tie Alignment
Step 1: Choose Your Weapon (The Right Tie)
Not all ties are created equal. For clean alignment:
- Thickness: Opt for a medium-weight silk tie (too thick hides detail; too thin crumples).
- Pattern: Stripes, checks, or subtle textures work best. Avoid overly busy prints.
- Length: Tip should hit your belt buckle when untied.
Step 2: Master the Knot (It’s Not Just About the Style)
The Four-in-Hand knot is slim and slightly asymmetrical—ideal for precise alignment. The Half-Windsor offers balance for wider collars. My personal win? The Pratt knot (Shelby)—centered, compact, and stripe-friendly.
Pro Tip: Always tie your knot in front of a mirror with natural light. Shadows hide imperfections!
Step 3: The Alignment Ritual
- Positioning: Let the wide end hang 12 inches lower than the narrow end.
- Wrap & Feed: As you loop, slow down at the final pass. Adjust tension to keep stripes centered.
- The Final Pull: Tighten gradually, using one finger to hold the knot’s base steady. Peek at the stripes—if they skew, loosen slightly and nudge the fabric.
Step 4: The Dimple—Secret Weapon of Pros
A centered dimple below the knot gives depth and keeps stripes straight. Pinch the fabric lightly as you tighten for that coveted crease.
Why My “Perfect Knot” Moment Changed Everything
That day—job interview, navy suit, silver-striped tie—felt different. As the Pratt knot slid up, the stripes locked into place like puzzle pieces. No twists, no wrinkles. Just a crisp, diagonal line cutting through the knot’s apex.
The result?
- Confidence Surge: Standing taller felt automatic.
- Compliments: “How do you get it so perfect?” became a refrain.
- Mindset Shift: Precision in small details signals care elsewhere—a lesson in mastery.
Common Mistakes That Sabotage Your Knot (& Fixes)
- Twisted Back Blade: Ensure the tie’s back blade (narrow end) isn’t visible. Tuck it into the loop.
- Over-Tightening: Crushed fabric distorts patterns. Leave room for a fingertip to slide under the collar.
- Rushing: Give yourself 3 extra minutes. Breathe. Adjust.
Beyond the Knot: Propping Up Your Victory
- Collar Stays: Keep shirt collars sharp so the tie sits proudly.
- Tie Bars/Clips: Position between 3rd and 4th buttons to anchor alignment.
- Steam, Don’t Iron: Wrinkles destroy symmetry. Hang ties or use a handheld steamer.
Final Thought: The Tie That Binds Confidence
The perfect tie knot isn’t vanity—it’s craftsmanship. When stripes meet knot in harmonious geometry, you’re not just wearing fabric; you’re embodying intent. So next time you loop that silk, remember: alignment is attitude. And once you nail it? There’s no going back.
Keywords for SEO:
Perfect tie knot, how to align tie stripes, menswear style tips, professional dressing, how to tie a necktie, tie dimple technique, Pratt knot guide, striped tie alignment, knot symmetry, tie confidence.
Ready to conquer your knot? Share your #PerfectKnit win below!